Learning to play the guitar is an incredibly rewarding experience, but it can also be a challenging one, especially for those who are just starting out. As a beginner, you may feel overwhelmed by the sheer amount of information out there, from complex music theory to intricate fingerpicking techniques. However, understanding basic guitar chords is the foundation of any successful guitar journey. These fundamental building blocks are essential for playing countless songs and will help you develop your skills as a guitarist. In this article, we will delve into the basics of guitar chords, including how to read chord diagrams, and the most important chords to learn as a beginner. Whether you are just starting out or looking to brush up on the essentials, this guide will provide you with the knowledge and tools you need to kick-start your guitar-playing journey. After you have read this article you should check out this article!
How to read Chord Diagrams
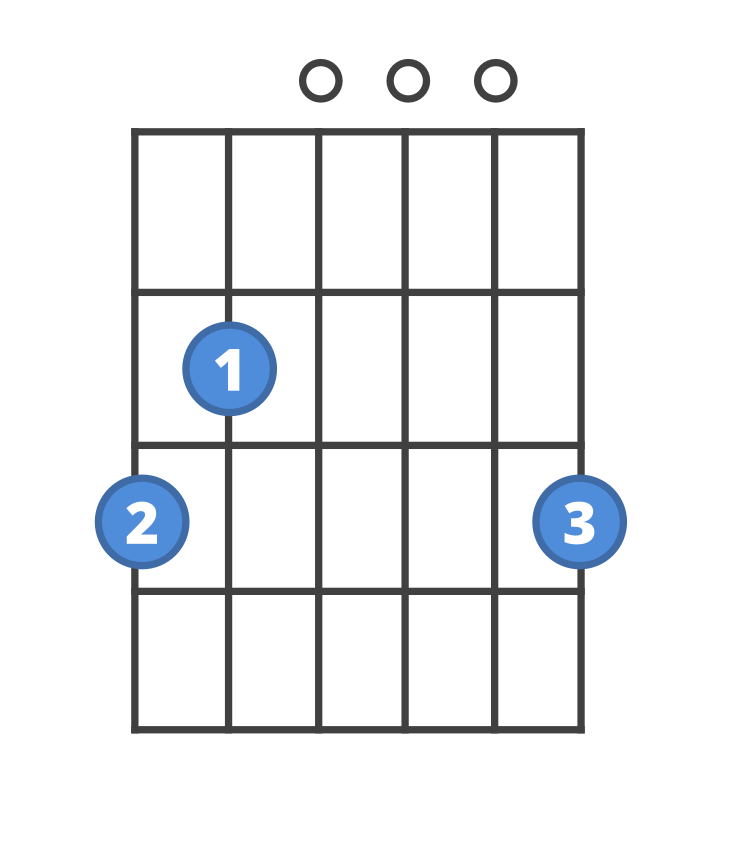
Chord diagrams are a common way to represent guitar chords visually. They consist of a grid that represents the guitar fretboard, with horizontal lines representing the guitar strings and vertical lines representing the guitar frets. Each dot or circle on the grid represents where you should place your finger to form the chord.
To read a chord diagram, start by orienting yourself with the diagram’s position on the guitar fretboard. The vertical line on the left of the diagram represents the guitar’s nut, while the horizontal line on top represents the highest string on the guitar. The dots or circles on the diagram represent where you should place your fingers to form the chord.
The numbers inside the dots or circles indicate which finger you should use to fret the corresponding string. For example, if you see the number 1 inside a circle on the third fret of the low E string, it means you should place your index finger on the third fret of the low E string.
The X symbol above a string means you should not play that string, while the O symbol means you should play the string open. Finally, the thick horizontal line at the top of the diagram represents the guitar’s nut, and you should not play any strings above this line.
By understanding how to read chord diagrams, you can quickly learn new guitar chords and expand your repertoire of songs to play. It takes practice to become proficient, but with time and dedication, you will master the art of reading chord diagrams and playing guitar chords with ease.
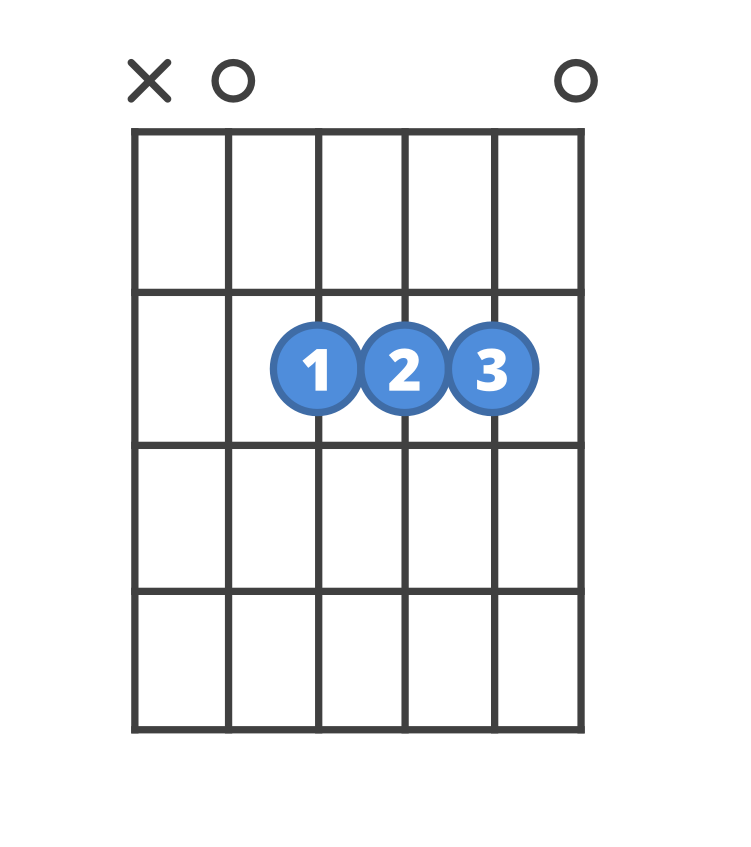
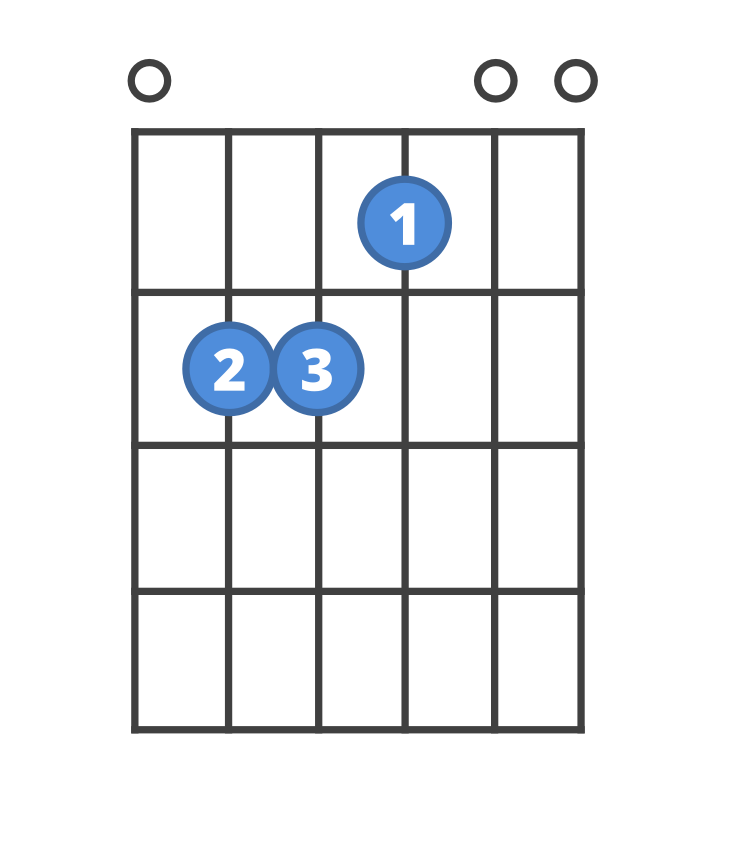
A Chord Guitar
To play an A chord on guitar, follow these steps:
Step 1: Place your middle finger on the second fret of the fourth (D) string.
Step 2: Place your ring finger on the second fret of the third (G) string.
Step 3: Place your index finger on the first fret of the second (B) string.
Step 4: Strum the bottom five strings of the guitar, avoiding the sixth (E) string.
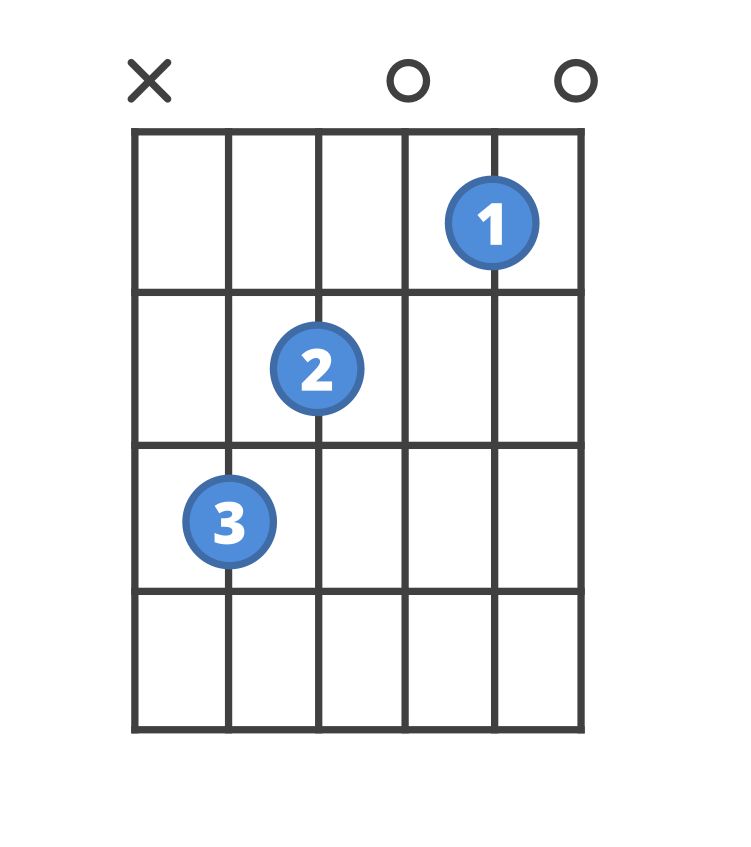
B Chord Guitar
The B chord on guitar can be a bit tricky to play for beginners, but with practice, it can become a staple chord in your playing. Here are the steps to play a B chord on guitar:
Step 1: Place your index finger on the first fret of the fifth (A) string.
Step 2: Place your middle finger on the second fret of the fourth (D) string.
Step 3: Place your ring finger on the third fret of the third (G) string.
Step 4: Place your pinky finger on the fourth fret of the second (B) string.
Step 5: Strum all six strings of the guitar.
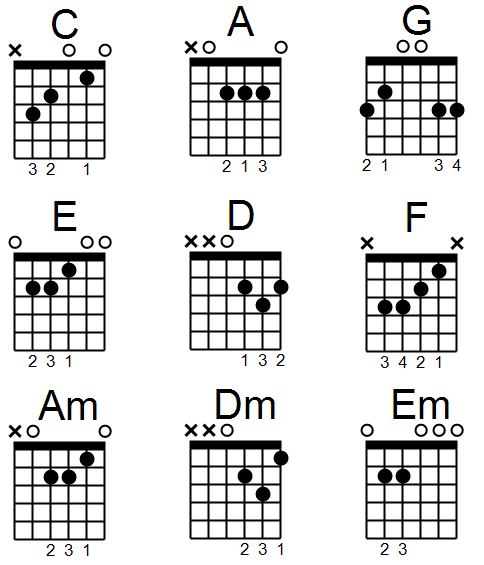
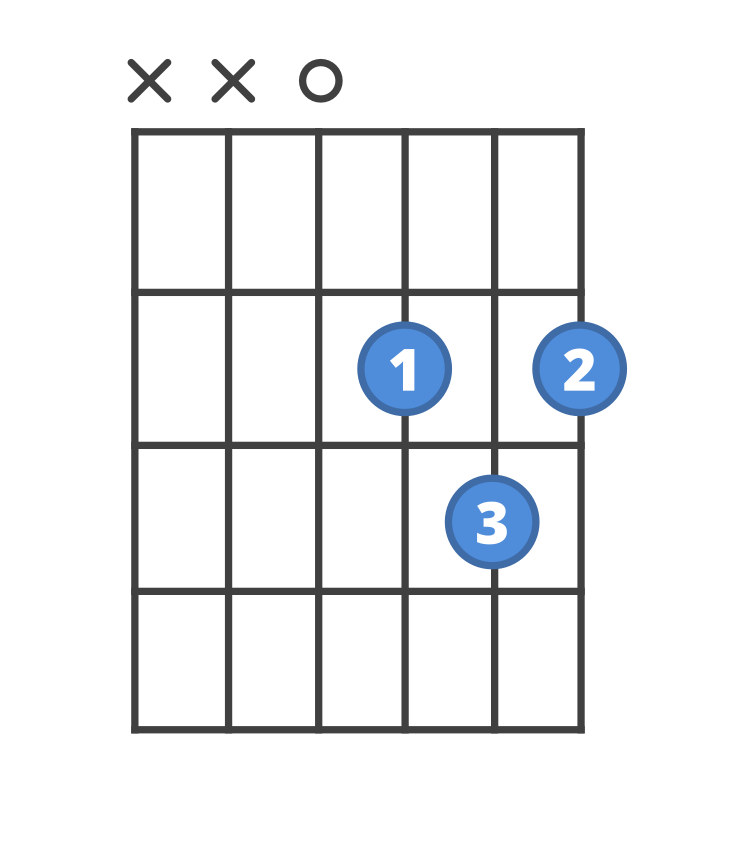
C Chord Guitar
The C chord is a fundamental guitar chord that is commonly used in many songs across various genres. Here are the steps to play a C chord on guitar:
Step 1: Place your ring finger on the third fret of the fifth (A) string.
Step 2: Place your middle finger on the second fret of the fourth (D) string.
Step 3: Place your index finger on the first fret of the second (B) string.
Step 4: Strum the bottom five strings of the guitar, avoiding the sixth (E) string.
D Chord Guitar
The D chord is another essential guitar chord that is commonly used in many songs across various genres. Here are the steps to play a D chord on guitar:
Step 1: Place your index finger on the second fret of the third (G) string.
Step 2: Place your middle finger on the second fret of the first (E) string.
Step 3: Place your ring finger on the third fret of the second (B) string.
Step 4: Strum the bottom four strings of the guitar, avoiding the fifth (A) and sixth (E) strings.
E Chord Guitar
The E chord is one of the most basic and commonly used chords on guitar. Here are the steps to play an E chord on guitar:
Step 1: Place your index finger on the first fret of the third (G) string.
Step 2: Place your middle finger on the second fret of the fifth (A) string.
Step 3: Place your ring finger on the second fret of the fourth (D) string.
Step 4: Strum all six strings of the guitar.
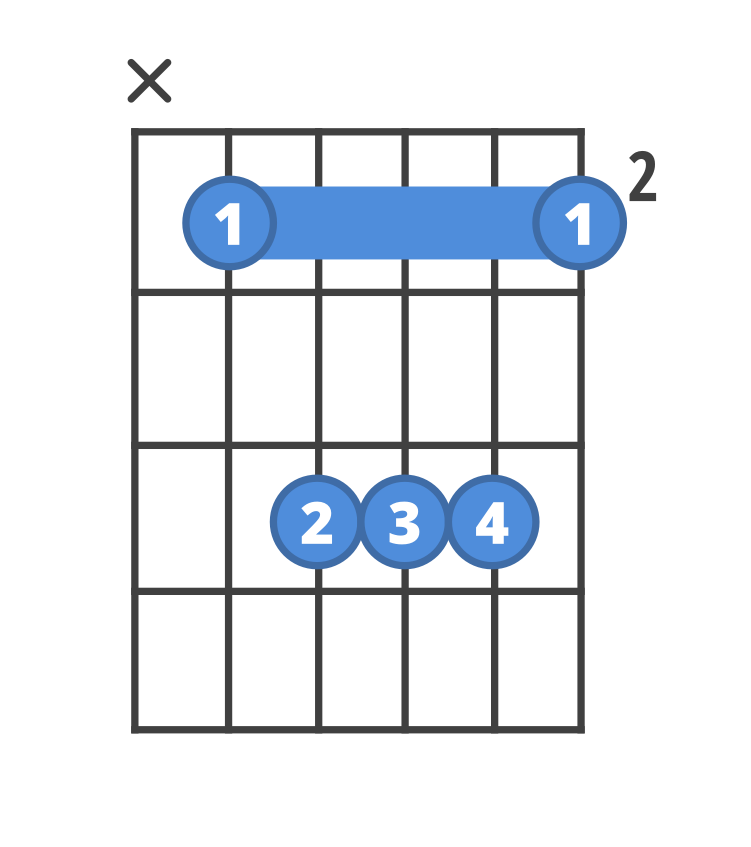
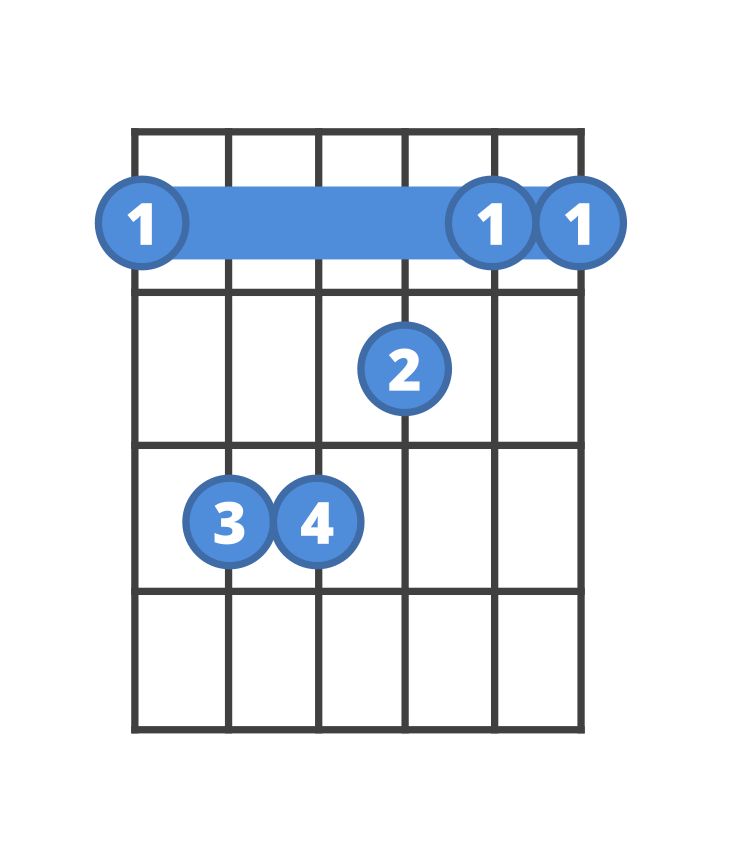
F Chord Guitar
The F chord is one of the more challenging chords for beginners to play on the guitar due to its barre chord shape. Here are the steps to play an F chord on guitar:
Step 1: Place your index finger flat across all six strings on the first fret of the guitar.
Step 2: Place your middle finger on the second fret of the third (G) string.
Step 3: Place your ring finger on the third fret of the fifth (A) string.
Step 4: Place your pinky finger on the third fret of the fourth (D) string.
Step 5: Strum all six strings of the guitar.
G Chord Guitar
The G chord is another fundamental guitar chord that is commonly used in many songs across various genres. Here are the steps to play a G chord on guitar:
Step 1: Place your index finger on the second fret of the fifth (A) string.
Step 2: Place your middle finger on the third fret of the sixth (E) string.
Step 3: Place your ring finger on the third fret of the first (E) string.
Step 4: Strum all six strings of the guitar.